Implement In App Purchases (IAP) only using StoreKit

In App Purchases is a method to sell your services or content through iOS apps. If you allow users to access your app for free, but you need to earn money when giving access to some parts of you app or some premium stuff access, best way is to integrate IAP. But Apple keeps 30% of your money. Anyhow mostly used way is integrating IAP to iOS apps. Today we’ll look how to integrate IAP to you iOS app. For that, Apple has provided StoreKit framework.
What are prerequisites?
- Having a developer account
- Bank account set up here (Agreements, Tax and Banking section)
- App has to be added to AppStoreConnect
- One/few sandbox accounts created here (Users and Access section -> Sandbox)
Now you have done few steps of this journey. We’ll see how to add In App Purchases items.
Once you’ve created the app from the AppStoreConnect, you can see a section called In-App Purchases. Under that section choose Manage.
Initial view will be as follow without any Purchases added.

Now you can add the options that you are going to provided to your users. For this tutorial I’ll be assuming that, I am providing two options as Monthly subscription and same subscription to be purchased Annually.
Press on the Plus button near the grey box.

For our scenario I am choosing the 3rd option which is auto renewable for a given time period by the app owner. Will see how to set renewal period. For now select 3rd option or the option suites for you.

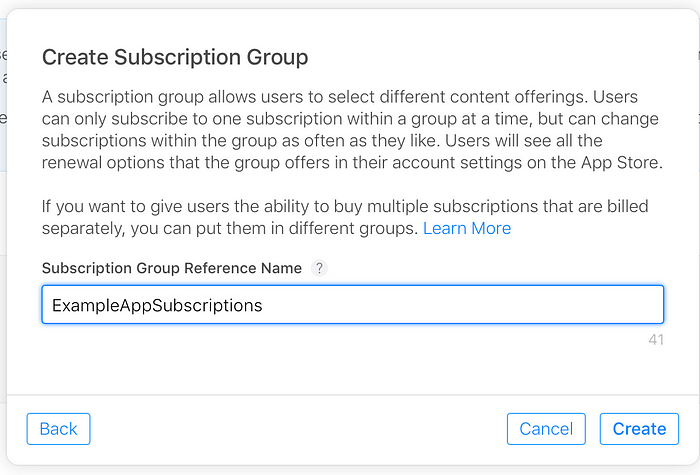
Here reference name is only for reference in the App Store Connect for developers or admins of the app. Product Id has to be a unique word. This will be used to identify a particular subscription in the App side as well as the App store. After pressing Next, for the first time you will be prompted to another input box to make a group. Or otherwise you will be shown with previously created group or an option to make another group. This group can be used to group set of subscriptions.
After creating a group and adding to a group, you can start to configure the purchase as follows.

Here you get the chance to add the duration for auto-renewable subscription. You get 1 week, 1 month, 2 months, 3 months, 6 months, 1 year options for duration. Next you can add a price for the particular subscription. There you can add in a currency you wish and set regions for sale.
Still you may notice a amber warning saying Missing Metadata. To fix that issue you have to add localisation strings and a screenshot. For this stage you can add just a png with the given resolution. But when you are submitting app for review, you have to add a real screenshot of the purchase pop up from a real device.
As above you can add subscriptions that you need. Here we are adding annual and monthly subscriptions. Subscription will be shown as follow in the group.

If it shows Ready to Submit you are good to start working with the code from the iOS app side.
TIP: According to my experience it takes few minutes to change state from Missing to Ready.( up to 15 mins)
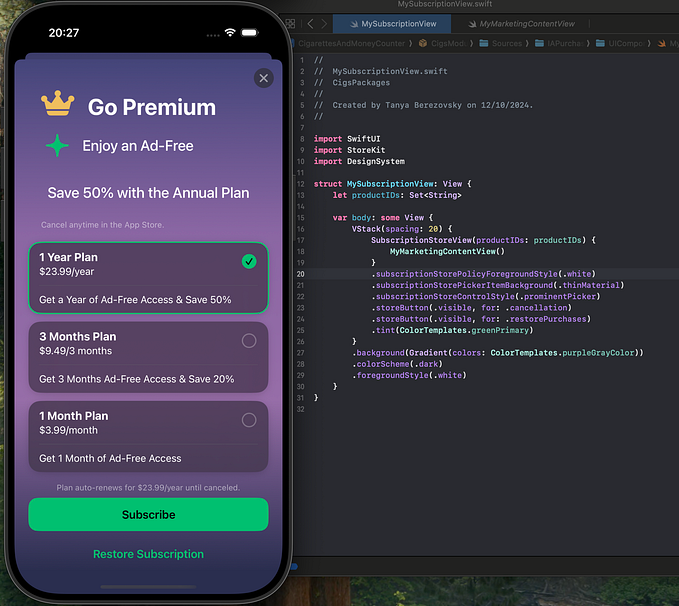
Below shown UI will be my UI to perform purchases. User can choose annual or monthly subscriptions which will be subscribed accordingly.

Before going to code, we have to add In-App Purchase as a capability for our app as follows.

First we will be making a separate class to handle StoreKit functions.
I’ll create a InAppPurchaseHandler.swift file to write In app purchase related code. It will be a singleton class.
These are the two files used to implement the In App Purchases.
First I’ll explain main points from InAppPurchaseHandler.swift file.
At the top I’ve added a enum called InAppPurchaseMessages for the easiness of returning messages at two possible transaction states Failed and Purchased.
Next enum is called PurchaseProduct. It’s used to keep track of available purchase subscriptions from the app side. String values given to enum cases have to match with ProductIds that we assigned when creating subscriptions from AppStoreConnect; and it is critical to be matching. You can use just strings in variables. But as my personal experience, this is a best practise when we need to track of such values. This eliminates typos and improves codability and maintainability.
I think next declared variables are self explanatory.
purchase and fetchAvailableProducts functions are the next main point to describe. In fetchAvailableProducts method, it converts given product ids to SKProductsRequest object. Then it assigns delegate to current view controller and sends a request to Apple App Store.
According to developer documentation: SKProductsRequest i an object that can retrieve localized information from the App Store about a specified list of products.
This fetchAvailableProducts method is used in the SubscriptionVC.swift to fetch the products. Once this request is sent to App Store, productsRequest protocol method triggers.
Behind the scene, Apple check whether there are subscriptions in the App Store with given product Ids from the app. If there are such subscriptions, response passes those products. Else, invalid identifiers are passed in products and invalidProductIdentifiers particularly.
In SubscriptionVC.swift, those fetched product details are populated and used to display the currency and App Store price for subscriptions.
If a used press on one of buttons to activate a subscription, purchase method is called. Once a purchase is triggered, that payment is added to a queue. This is handled by paymentQueue method of SKPaymentTransactionObserver protocol.
If a transaction is updated, this method triggers with an array of transactions. Each transaction consist of few useful properties such as SKPaymentTransactionState, error, payment. This transactionState is useful to know whether transaction was failed or purchased or else. According to state we can proceed. Here I have used failed and purchased states only. You can try with purchasing and restored states too according to scenario.
Here I have passed the transaction details to the view controller so these cases can be handled separately in UI. Code under UI part is easy to understand. So I’ll stop the implementation explanation here.
So we have come to the end of this tutorial. Before ending this I’ll show how to test this implementation.
First build this to a real device and open Settings -> App Store. At the end you can see a section called SANDBOX ACCOUNT. You have to add an account that you created at the very begin as a test user.
Now you can open the app and go to purchasing screen. Once you click on a button, you can see a pop up as below.

Here you add password and perform the transaction.
Some errors may happen when trying to purchase. Try to check following things in such case.
- Subscription is converted to Ready to submit in AppStoreConnect
- Logged in to correct sandbox account from settings page as mentioned above or try logout and login again
Thanks for reading this tutorial. Add a comment if you see any modification needed or something else.